Friday, 18 July 2014

Butterflies at Jimmy's Farm

A few weeks ago the Wivenhoe Photography Group jumped in a car and spent a pleasant Saturday photographing the beautiful and exotic butterflies at Jimmy's Farm. 


 The butterflies live in a purpose built house so the light is not to contrasty, being diffused by the translucent ceiling.


That meant increasing ISO to 400 for handheld shots; I left the tripod at home, not being sure it would be ok to use in there.


Shooting with a 60mm macro lens at f2.8 helped with the low light levels, of course.


The shallow depth of field produced by f2.8 at close quarters also suited the subject, helping the butterflies stand out from quite busy backgrounds.


 I tried a few different angles - it's too easy to focus exclusively on the fascinating and often colourful wings.


Stepping back and framing the butterflies with the surrounding foliage also produced some variety.


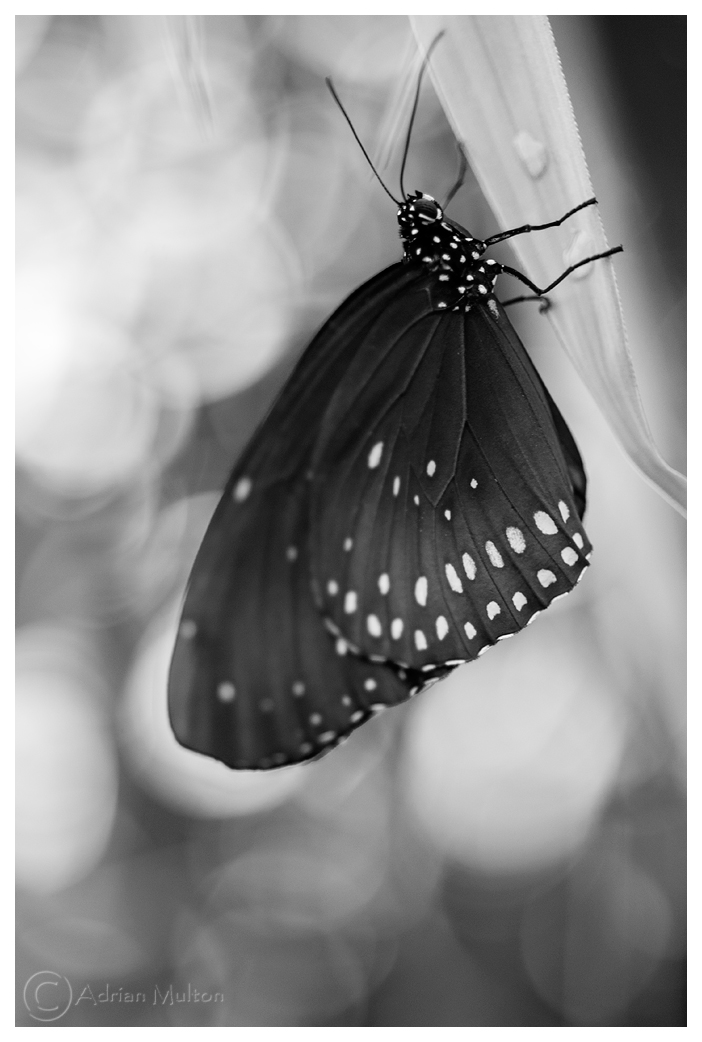
 Some lovely soft bokeh was captured when the light came through the foliage in the background.


I thought this fellow deserved the black and white treatment too.


This was probably my favourite butterfly; simple and elegant patterning.


 It was also happy to play ball. Some were more elusive and required some patience before they settled close enough to capture with the 60mm.


Apart from black and white conversions, largely avoided the sfx with this set - the next image being the exception; a bit of my personal version of the digital stocking filter applied.


A reminder of their fragility.


Focus on the eyes.


Colours were pumped up a little in post, of course, to counteract the relatively unsaturated appearance of RAW images. 


I use curves in the LAB colourspace to boost colour, rather than the hue/saturation slider.


 This allows you too boost colour without changing the brightness of the image.


The feeding trays were always a good spot to find one or two butterflies, but I prefered the more natural backgrounds.


A bit of creative use of negative space.


Finally, wings are not the only source of patterns.


Wednesday, 9 July 2014

King John

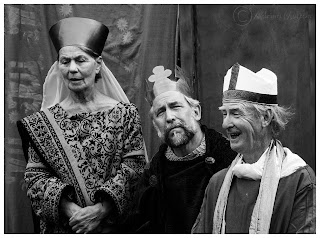
Some snaps from the technical rehearsal of the Wivenhoe Open Air Shakespeare production of King John. Shot in St Mary's churchyard on Sunday 6th of June 2014.


More information about performances.

Tuesday, 27 May 2014

The Same, But Different

These images came from a collaboration with make up artist Caja Dan and model Emma (Emerald on Model Mayhem).The idea was to shoot some mirror images and then composite the images together to show different expressions in the 'original' and mirror image Emmas.

I shot two exposures of each pose, one focused on Emma, and one on her reflection - this gave me maximum flexibility to mix and match during post producation. Eyes are usually the primary point of focus in portrait imagery, and I stuck with that convention. However I also wanted the reflected eyes to be reasonably sharp, which due to the wide aperture used and close proximity of camera to subject , wasn't the case when focusing on 'real' Emma.

Emma was brilliant to shoot with; she had to be very disciplined in the same way that a model posing for an artist might be; the slightest movement of her head between shots would interfere with the compositing process, so all she could move were her eyes and mouth. Sounds simple enough, but we naturally tend to move our heads a little when someone is speaking to us or giving direction.

The lighting needed to be controlled quite precisely too. Although skin may be softened in Photoshop, it's always best to start with a photo that is kind to the skin straight out of the camera. I used a medium octabox as the main light, with a white reflector to fill in the shadows a little. The octabox had to be positioned so as not to glare in the mirror, flatter the skin, whilst also providing some modelling or definition. Using the reflector as fill (rather than a second flash) prevented issues with glare as it was directly in front of the mirror.

Whilst a fan of all-in editing (which is not to everyone's taste) I don't normally go for sfx that are really obviously artificial. However, I thought it might be interesting to create a variant that presented a 'negative' of Emma as the reflection.
Most of the compositing in this series was relatively straight forward, requiring basic manipulation of layers, layer masks, selection tools and blending modes.  This last image was a little more time consuming as the 'join' involved a lot more contrast between the two source images, so needed to be particularly smooth.


Wednesday, 5 March 2014

Just Beyond The Window

Forget the lawnmower and pruners, any serious tog should be tooling up with their cameras and macro lenses when venturing into their back gardens.


 It's a time to celebrate the return of vibrant colour to the world.


But keep in mind that flowers may look just as interesting when lit from the side or behind, than by full frontal light (sun or flash).


Maybe you want to concentrate on form, shape and pattern - black and white is perfect for this, as colour is a significant distraction in most images.


The foliage here (above and below) acts as a natural 'gobo'; that is, it partially blocks the light creating a delicate pattern of shadowing across the petals.


Partial desaturation can create a moodier look for your floral photography. Colour is hinted at, but doesn't dominate the image. A simple slide to the left on the saturation slider in Photoshop achieves this.


Getting in real close with a macro lens on your SLR (or lenses on compacts and bridging cameras) can offer a dramatically different perspective on a subject. A tripod (or other support) will be necessary to avoid motion blur caused by camera shake or even the gentlest breeze. Movement is more noticeable the closer you get to your subject.


Open up that aperture for a truly abstract view of the world.

Finally, a confression. None of these images were shot in my garden - or even outside. The subject was a vase of flowers on my kitchen window sill. Crop and angle hides many sins!

Thursday, 23 January 2014

Sun Zoom

This update is all about returning to roots: both the roots of this blog (pictorialism), and the roots of many a tog's first experiments with creative photography - the sunset.


Few can resist the vibrant explosion of colour presented by a beautiful sunset, although there are regrettably a few cynics who look down on sunset photography due to its sheer popularity and the relative ease of capture (especially when the foreground is thrown into silhouette).
So I thought I would combine the humble sunset with another simple photographic technique: zooming.


All you need for zooming is a zoom lens that you can control manually. A telephoto or medium focal length zoom is probably best, though a wide angle zoom could also work. Most dSLR owners will have the medium zoom shipped with their camera body. 
Compact owners, if your camera allows you to operate the zoom controls whilst the shutter is released then you can try this too.


The idea is to zoom the lens in or out whilst taking the shot. To achieve this you will require a slow shutter speed - anything from about 1 second to 4 or 5 seconds. Since you are shooting a relatively bright scene, you will need to dial in the lowest ISO possible, and probably the smallest aperture possible. If that still does not give you the shutter speed required, try a neutral density filter, or even your polariser (which general swallows about 2 stops of light).
You do not need a tripod since the result image will be lovely and blurry anyway, but it does help if you stand in a stable position and perform a nice smooth zoom.


You can experiment with zooming in vs zooming out, different shutter speeds, zooming in and out, and even lateral movements while zooming.
The results are unlikely to win any Pulitzer prizes, but if you like simple pictorial art as much as I do, images created with this technique would look great as a large colourful canvas on your wall.


Thursday, 16 January 2014

Bad Candy

Ok, a bit of a fun update. I bought some sweets with an eye to creating macro imagery to promote my business; the results of that can be seen on my Facebook Page. The not-so-sweeties here didn't make the final cut, but I did like the way these normally enticing confections looked quite mean and moody when strongly backlit by window light.
(Just in case the sweet manufacturer is looking in, they still tasted great!). 


Sweets are usually cute and, well, tasty looking, but these sweeties lit from behind looked anything but
I shifted the white balance, so the images rendered a cool blue, enhancing the sense of the sinister. I also used a piece of white card to bounce some light onto the front of the scene.
Next I cranked up the drama with a touch of the old ultraviolence...


The little golden 'stones' just happened to appear when I was shooting; they normally hide inside an armchair, but our kittens had trashed the underside and they flooded out onto the carpet. I decided they could add something to both set and story...


I went for a warmer look with the image above, picking up the natural colour of the sweet and stones, but returned the blue white balance treatment with this last gang of bad boys - they looked pretty frosty already.


No sweets were harmed during the making of these images - though I cannot honestly claim they survived for very long after the shoot - I have a notoriously sweet tooth.